

In This Article
Right, let’s address the elephant in the meter cupboard: Octopus Agile is brilliant right up until you forget to check the app and end up running your tumble dryer at 5:30pm, at which point you’re paying more than double what a night-owl neighbour pays for the exact same load of towels. An energy monitor for Octopus Agile exists to solve that one specific problem — it watches the half-hourly rate for you, nudges you when things get cheap (or expensive), and, in the better setups, actually flicks appliances on and off without you lifting a finger.
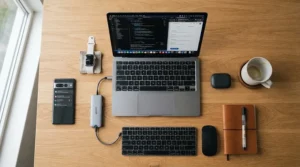
What is an energy monitor for Octopus Agile? It’s a device — a smart in-home display, a clamp-on whole-home monitor, or an energy-tracking smart plug — that reads your real or near-real-time electricity use and, when paired with Octopus’s public API, cross-references it against the current half-hourly unit rate so you can see, at a glance, whether now is a cheap slot or a “please don’t put the kettle on” slot.
We’ve gone through the actual hardware people are buying on amazon.co.uk for this exact job, dug into how each one plays with Octopus’s tools, and worked out where the real value sits versus where you’re just paying for a nicer screen. No invented five-star reviews here — where genuine review sentiment exists, we’ve said so; where it’s more sensible to lean on spec comparison and community reports from forums like the OpenEnergyMonitor community, we’ve done that instead.
One quick housekeeping note before we dive in: as an Amazon Associate we earn from qualifying purchases made through links on this page, at no extra cost to you. Right, kettle on (once the price drops) — let’s get into it.
Quick Comparison Table
| Monitor | Best For | Meter Type | Price Range |
|---|---|---|---|
| Tapo P110 | Budget appliance-level tracking | Any (plug-level) | under £20 |
| Shelly Plug S | Automated cheap-slot switching | Any (plug-level) | £20-£30 range |
| Hildebrand Glowstick | SMETS1 (older) smart meters | SMETS1 | £45-£60 range |
| Hildebrand Glow Display | Real-time whole-home viewing | SMETS2 | £55-£75 range |
| Shelly EM | DIY whole-home clamp monitoring | Any (clamp) | £45-£65 range |
| Emporia Vue 2 | Circuit-by-circuit breakdown | Any (clamp) | £100-£140 range |
| Aeotec Home Energy Monitor Gen5 | Z-Wave smart home integration | Any (clamp) | £90-£120 range |
Looking at the spread above, the split really comes down to how deep you want to go. If you just want to stop your washing machine running during the 5pm price spike, a smart plug like the Tapo P110 or Shelly Plug S gets you there for under £30. If you want to see your whole house’s consumption mapped against Agile’s half-hourly pricing in one dashboard, you’re looking at the clamp-based options like Shelly EM or Emporia Vue 2. Nothing here is exclusive — plenty of Agile households run a whole-home monitor and a couple of smart plugs on their worst offenders (dishwasher, tumble dryer, EV charger) at the same time.
💬 Found a monitor that changed how you use electricity? A quick share helps other Agile customers find this guide too!
Top 7 Energy Monitors for Octopus Agile: Expert Analysis
The seven products below span the full range from “£15 and a phone app” to “proper whole-home circuit-level data feeding into Home Assistant.” All are real products currently sold through Amazon UK listings or their manufacturers’ direct UK stores. None of them are made by Octopus itself — Octopus’s own free app already gives you tomorrow’s rates — so think of these as the layer that turns “knowing the price” into “actually doing something about it.”
1. TP-Link Tapo P110 — cheapest way to track and automate one appliance
The standout here is the price: you can pick up a Tapo P110 for less than a large coffee and a pastry, and it’s genuinely one of the easiest devices on this list to set up. It reports real-time wattage and cumulative kWh through the free Tapo app, and it can be scheduled to switch on at a fixed time — useful if you know your dishwasher always runs cheapest between 1am and 4am on Agile.
On paper this means you’re getting energy monitoring and remote scheduling for the price most brands charge for scheduling alone. The catch is that the Tapo P110 has no direct Agile API integration out of the box, so “smart” scheduling here means you manually check tomorrow’s cheapest window in the Octopus app and set the timer to match — it won’t dynamically react if prices shift. Reviewers consistently report that the Kasa/Tapo ecosystem is stable for basic on/off control, though a few note the app’s historical energy graphs feel more like an afterthought than a proper analytics tool.
Who’s this for? Honestly, anyone dipping a toe into Agile monitoring for the first time. If you’ve got one obviously expensive appliance — an electric shower, a tumble dryer, an ageing chest freezer — this is the cheapest way to find out exactly what it costs you and start nudging its schedule toward the cheap half-hours.
Pros:
- ✅ Genuinely budget-friendly entry point into monitoring
- ✅ Simple app-based scheduling, no hub required
- ✅ Works with Alexa and Google Assistant for voice checks
Cons:
- ❌ No native Octopus Agile price integration
- ❌ Manual scheduling only — doesn’t react to live rate changes
At under £20, the Tapo P110 is close to a no-brainer as a first step, though it’s a monitoring tool rather than a true “smart with Agile” solution — you’re doing the thinking, it’s doing the switching.

2. Shelly Plug S — best for genuinely automated cheap-slot switching
What sets the Shelly Plug S apart is that it exposes a local API and works cleanly with Home Assistant, which matters enormously once you bring Octopus Agile’s own API into the mix — this is the plug of choice among the DIY home-automation crowd on the OpenEnergyMonitor and Home Assistant forums specifically because it can be told “turn on whenever the Agile rate drops below 10p” and it’ll just do it, no manual scheduling required.
The plug itself reports wattage, voltage, and cumulative energy, updating roughly every second, considerably faster than most rivals in this price band. Based on the spec comparison with the Tapo P110, the real difference isn’t the monitoring accuracy — both are decent — it’s that the Shelly Plug S can be wired into an automation, not just a fixed clock. What most buyers overlook is that this does mean a slightly steeper setup: you’ll want Home Assistant (or at minimum the Shelly Cloud app plus some patience with its scripting) rather than a five-minute plug-and-play experience.
Community sentiment on forums is consistently favourable regarding reliability over months of continuous use, though a recurring theme in user reports is that the companion Shelly Cloud app’s energy graphs are less polished than dedicated apps like Tapo’s, since Shelly’s real strength is the API rather than the interface.
Pros:
- ✅ True dynamic automation against live Agile rates via Home Assistant
- ✅ Fast, accurate real-time power reporting
- ✅ No proprietary hub needed — connects straight to Wi-Fi
Cons:
- ❌ Requires Home Assistant for the clever bits
- ❌ Companion app’s own graphs feel basic by comparison
In the £20-£30 range, this is the pick for anyone who actually wants their appliances to react to the market rather than a fixed guess at “probably cheap o’clock.”
3. Hildebrand Glow Glowstick — best for older SMETS1 smart meters
The Hildebrand Glow Glowstick is a headless little device built specifically to solve a problem Octopus Agile customers with first-generation (SMETS1) smart meters run into constantly: most modern in-home displays simply won’t talk to an older meter. The standout advantage is that it plugs directly into the meter’s own data output and streams readings to Hildebrand’s Glowmarkt platform via MQTT, independent of which supplier you’re with.
In practice, that means near-real-time electricity (and gas, where fitted) data becomes available through the free Bright app, and — more importantly for this audience — through the Glowmarkt API, which several popular Home Assistant integrations use to pull consumption data alongside the Octopus Agile pricing integration. What the spec sheet won’t tell you, but community threads make clear, is that SMETS1 compatibility varies by meter manufacturer (Secure Meters models tend to be the most reliable pairing), so it’s worth checking your meter model before ordering.
Reviewers in energy-monitoring forums frequently praise Hildebrand’s customer support, describing email responses arriving the same day, which counts for a lot with a device this niche. The trade-off is that the Glowstick itself has no display — you’re entirely reliant on the app or a third-party dashboard to see anything.
Pros:
- ✅ One of very few options that works with SMETS1 meters
- ✅ Feeds clean data into Home Assistant’s Agile integrations
- ✅ Praised support directly from Hildebrand
Cons:
- ❌ No on-device screen — app or dashboard required
- ❌ SMETS1 compatibility depends on your specific meter model
For the specific slice of Agile customers stuck on an older meter, this is less “one of several options” and more “the option,” which justifies the £45-£60 range price tag.
4. Hildebrand Glow Display (GD-1) — best for real-time whole-home viewing on SMETS2
Where the Glowstick is headless, the Hildebrand Glow Display is the opposite: a proper in-home display with its own screen, built for SMETS2 meters, showing near-real-time wattage, daily spend, and historical trends without needing a phone in hand. The standout feature is that it doubles as a Consumer Access Device (CAD), meaning it also exposes that same data to the Glowmarkt API for anyone wanting to layer Agile pricing on top via Home Assistant or a spreadsheet.
Key spec context: it connects via Zigbee to your SMETS2 meter’s Home Area Network, the same wireless system your official supplier IHD uses, so there’s no reliance on your home Wi-Fi for the meter link itself (although the display needs Wi-Fi to sync to the cloud and app). Compared with the free in-home display most suppliers hand out, the honest analytical take is that the extra spend buys you the third-party API access that supplier IHDs generally lock down — that’s the entire reason serious Agile users pay for one instead of using the free unit sitting in a drawer.
Community members on the OpenEnergyMonitor forum who’ve run one for extended periods describe it as reliable day-to-day, with the caveat that occasional Zigbee pairing hiccups after a power cut aren’t unheard of — a fair trade for most, given the alternative is a proprietary display with no external access at all.
Pros:
- ✅ Genuine real-time display, no phone required to check usage
- ✅ Doubles as a CAD for Home Assistant/API access
- ✅ Uses the meter’s own secure network, not your home Wi-Fi
Cons:
- ❌ SMETS2 only — won’t help SMETS1 households
- ❌ Occasional reconnection hiccups reported after power cuts
At £55-£75, it sits in the mid-range sweet spot for anyone who wants both a physical screen on the wall and the underlying data access that actually makes Agile automation possible.
5. Shelly EM — best DIY whole-home clamp monitor
The Shelly EM clips onto your consumer unit’s tails with a current clamp rather than plugging into a socket, which is the standout advantage here: it measures your entire home’s draw, not just one appliance, and reports it locally over Wi-Fi with genuinely low latency. For Agile users running Home Assistant, that whole-home wattage figure is the missing half of the automation puzzle — Octopus Agile tells you the price, the Shelly EM tells you exactly how much you’re using right now, and together they let you build a live “cost per minute” dashboard.
Specs worth flagging: it supports one or two clamps (single or split-phase monitoring), reports via its own local API and MQTT, and — unlike the plug-style options — needs installing near your consumer unit, which for most households means either DIY with basic electrical confidence or a qualified electrician for the initial fit. Based on the spec comparison with plug-level monitors, this is the trade you’re making: broader visibility for a fiddlier install.
User reports across smart-home communities are largely positive on long-term stability, with the most commonly cited frustration being that Shelly’s own app is aimed at technical users — if you want pretty graphs rather than raw numbers, you’ll likely end up piping the data into Home Assistant anyway.
Pros:
- ✅ Whole-home visibility from a single device
- ✅ Local API with no cloud dependency for core function
- ✅ Pairs naturally with Home Assistant’s Agile integrations
Cons:
- ❌ Clamp installation isn’t as plug-and-play as a smart plug
- ❌ App experience skews technical rather than consumer-friendly
In the £45-£65 range, it’s arguably the best value whole-home option on this list for anyone comfortable with (or willing to pay an electrician for) a proper clamp install.

6. Emporia Vue 2 — best for circuit-by-circuit breakdown
The Emporia Vue 2 goes a step further than whole-home totals: fitted with up to sixteen additional CT clamps at the consumer unit, it can show you exactly what your immersion heater, EV charger, and kitchen ring are individually costing you, half-hour by half-hour. That circuit-level granularity is the standout feature, and it’s genuinely difficult to replicate with any other device on this list without buying several smart plugs.
In practical terms, the app breaks total consumption down by circuit with reasonably accurate estimation (accuracy on unmetered circuits improves as its algorithm “learns” your appliance signatures over the first few weeks), and its data can be exported or, via community-built integrations, pulled into Home Assistant to sit alongside Octopus Agile pricing. What most buyers overlook is that the core unit and clamps handle the hardware side fine, but building the actual price-vs-usage dashboard still requires the same third-party integration work as the Shelly EM — Emporia’s own app doesn’t know what Octopus Agile is.
Aggregated sentiment from UK buyers and reviewers points to strong satisfaction with the level of appliance-level detail relative to price, tempered by occasional notes that circuit identification takes patience to fine-tune in larger or older properties with less predictable wiring.
Pros:
- ✅ Circuit-level detail unmatched by whole-home-only monitors
- ✅ Scales to 16 circuits for larger, more complex homes
- ✅ Data exportable for custom Agile-cost dashboards
Cons:
- ❌ Requires third-party work to connect directly to Agile pricing
- ❌ Circuit auto-detection needs a settling-in period
At £100-£140, this is a premium pick, but for households with an EV, a heat pump, and a home office all pulling separately, knowing which one is actually driving the bill during peak Agile hours is worth the outlay.
7. Aeotec Home Energy Monitor (Gen5) — best for Z-Wave smart home integration
If your home is already built around a Z-Wave hub — SmartThings, Home Assistant with a Z-Wave stick, or similar — the Aeotec Home Energy Monitor Gen5 slots in as the standout choice, using up to three clamps to report whole-home and per-circuit-group wattage directly into your existing smart home ecosystem without a separate proprietary app in the loop.
Specs worth understanding in practice: it reports both instantaneous wattage and cumulative energy over Z-Wave, meaning update speed and range depend somewhat on your existing mesh network’s health rather than a fixed Wi-Fi connection — for households with a solid Z-Wave setup already, that’s a genuine advantage over adding yet another Wi-Fi device to the router’s workload. Paired with an Agile pricing automation in Home Assistant, it becomes part of the same dashboard as your lights, heating, and EV charger, rather than a bolt-on app.
Reviewers who already run Z-Wave smart homes tend to rate it highly specifically for that native fit, while those without an existing hub note — fairly — that buying a Z-Wave controller just to use this monitor tips the value equation the other way.
Pros:
- ✅ Native integration for existing Z-Wave smart homes
- ✅ Up to three clamps for flexible circuit grouping
- ✅ No separate cloud app required for core operation
Cons:
- ❌ Needs an existing Z-Wave hub to be worthwhile
- ❌ Update speed tied to your mesh network’s performance
In the £90-£120 range, it’s a strong pick only if the Z-Wave ecosystem is already part of your setup — otherwise, the Shelly EM gets you similar whole-home data more simply.
| Monitor | Meter/Install Type | Real-Time Data | Best For | Price Range |
|---|---|---|---|---|
| Tapo P110 | Plug-in | Yes (app) | First-time single-appliance tracking | under £20 |
| Shelly Plug S | Plug-in | Yes (local API) | Automated cheap-slot appliance control | £20-£30 range |
| Hildebrand Glowstick | Meter-connected | Yes (via MQTT) | SMETS1 households | £45-£60 range |
| Hildebrand Glow Display | Meter-connected (Zigbee) | Yes (on-screen + API) | SMETS2 whole-home viewing | £55-£75 range |
| Shelly EM | Clamp | Yes (local API) | DIY whole-home monitoring | £45-£65 range |
| Emporia Vue 2 | Clamp | Yes (app) | Circuit-level breakdown | £100-£140 range |
| Aeotec HEM Gen5 | Clamp (Z-Wave) | Yes (Z-Wave) | Existing Z-Wave smart homes | £90-£120 range |
Reading across this table, there’s a clear price-to-depth curve: the two smart plugs get you started for under £30 but only ever see one appliance, while the four whole-home options roughly double or triple that outlay in exchange for a full-house view. Households already invested in Home Assistant tend to get the most value from the Shelly EM or Hildebrand Glow Display, since both hand over clean local data without a subscription, whereas Emporia Vue 2 buyers are typically chasing appliance-level detail specifically, price be damned.
Setting Up Your Agile Energy Monitor: The First 30 Days
Getting the hardware on the wall (or clamped round a cable) is the easy 20%. The next thirty days are where most of the actual savings get found or missed, so here’s the setup sequence worth following rather than skipping.
Start by connecting your monitor’s data feed to whatever will show you Agile pricing alongside it — for most people that’s the free Octopus Energy app, which already displays tomorrow’s half-hourly rates from around 4pm the day before, or Home Assistant with the community Octopus Agile integration if you’re using a Shelly, Glow, or similar device that exposes an API. Spend the first week simply watching, without changing a single habit — you need a baseline of what you actually use and when, before you can meaningfully shift anything.
In week two, pick your single biggest, most flexible load — usually the washing machine, dishwasher, tumble dryer, or EV charger — and start manually timing just that one appliance to the cheapest available half-hour window each day. Common mistakes in this first month include over-automating too early (trying to shift six appliances at once and getting confused about what actually saved money), ignoring the standing charge entirely when calculating savings, and forgetting that Agile’s cheapest windows shift with the seasons and wind generation, so yesterday’s 2am bargain isn’t guaranteed tomorrow.
By week four, if you’re on a device that supports it, move from manual timing to a genuine automation — a Home Assistant rule that switches your immersion heater or EV charger on whenever the live Agile rate drops below a threshold you set is a natural next step and removes the daily “did I check the app” friction entirely.
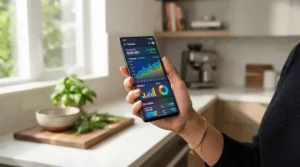
Real-World Scenarios: Who Actually Saves by Shifting Usage to Cheap Slots
Numbers in the abstract only get you so far, so here are three genuinely different households and how their monitor choice maps to their situation.
Take a flat-sharing couple in Manchester with no EV, no storage heating, and a fairly ordinary electricity footprint of one washing machine load every couple of days. For them, a single Shelly Plug S on the washing machine, automated to fire whenever the Agile rate drops below roughly 12p, is genuinely enough — the rest of their usage (lighting, fridge, laptop chargers) is too small and too constant to be worth actively shifting.
Compare that with a family of four in Leeds running an EV, an electric shower, and a tumble dryer through a British winter. Here, the case for a whole-home monitor like the Shelly EM or Emporia Vue 2 is much stronger, because the EV charging alone can represent a third of the entire household’s electricity spend, and knowing precisely how much the shower costs versus the dryer during a 5pm price spike changes which one gets postponed on a busy evening.
Then there’s the retired couple in Cornwall on a SMETS1 meter installed years ago, with a storage heater eating a big chunk of the bill through winter. For them, the choice narrows considerably: the Hildebrand Glowstick is realistically their only sensible route to real-time data at all, since most newer monitors simply won’t talk to their meter generation — a good reminder that “best” here always depends on what your existing meter will actually support.
✨ Not sure which household you’re closest to? Compare the specs above against your own biggest appliances before you buy.
Problem → Solution: Fixing Common Agile Monitoring Headaches
Problem: I keep missing the cheap overnight slot because I’m asleep. Solution: this is precisely what a Shelly Plug S or a Home Assistant automation solves — set the threshold once, and the appliance switches itself on without you needing to be awake to see the price drop.
Problem: My in-home display shows usage but not cost against Agile’s actual rate. Solution: most supplier-provided IHDs are locked to that supplier’s own tariff logic. A device like the Hildebrand Glow Display that exposes a CAD/API is the fix, since it lets Home Assistant or a spreadsheet combine your live wattage with Octopus’s published half-hourly rates.
Problem: I don’t know which appliance is actually driving my bill. Solution: whole-home totals from a Shelly EM hide the detail; circuit-level monitors like the Emporia Vue 2 are built precisely for isolating the culprit.
Problem: I’ve got an older SMETS1 meter and nothing seems compatible. Solution: check the Hildebrand Glowstick first — it’s one of the few devices specifically built around SMETS1 quirks rather than assuming everyone has the newer meter generation.
Problem: Prices spike and I only find out after the fact. Solution: this is a notifications problem rather than a hardware problem — see the dedicated section below on setting up genuine Agile price alerts.
How to Choose an Energy Monitor for Octopus Agile
Working through the options above in order tends to save the most wasted money:
- Check your meter generation first. SMETS1 and SMETS2 meters aren’t interchangeable in terms of compatible hardware, and this single fact eliminates most of the wrong purchases before you’ve spent a penny.
- Decide whole-home versus single-appliance. If one obvious appliance dominates your bill, a smart plug is cheaper and simpler; if usage is spread across several loads, a clamp-based whole-home monitor earns its higher price.
- Confirm it actually integrates with Agile pricing, not just “smart tariffs” in general. Some devices advertise generic time-of-use support without a genuine link to Octopus’s specific half-hourly API.
- Factor in your appetite for setup complexity. Plug-and-play apps suit most people; local-API devices like Shelly reward those willing to use Home Assistant.
- Look at update frequency, not just “real-time” marketing. A device polling every 30 seconds behaves very differently in an automation than one updating once a minute.
- Weigh subscription-free versus cloud-dependent options. Devices with local APIs (Shelly, Glowmarkt) tend to keep working even if a company’s cloud servers have a bad day.
- Match the price to how much you’ll realistically shift. According to the Energy Saving Trust’s guide to time-of-use tariffs, the savings from tariffs like Agile scale directly with how much demand you can genuinely move outside peak hours — buying premium hardware to shift very little usage rarely pays for itself.
Half-Hourly Pricing Explained: Why It Changes Everything
Half-hourly pricing is the single feature that separates Agile from a standard variable tariff, and it’s worth understanding properly rather than just glancing at the app each evening. Instead of one flat rate all day, Octopus Agile publishes a new unit rate for every thirty-minute period, typically released between 4pm and 8pm for the following day, tracking the wholesale electricity market plus network costs.
What that means in practice: a kettle boiled at 3am during a windy, low-demand night might cost a fraction of what the same kettle costs at 6pm on a still winter evening when gas plants are working hardest to meet demand. An energy monitor for Octopus Agile earns its keep specifically because it turns that abstract half-hourly rate into something you can actually see against your own real consumption, rather than trusting memory or guesswork about when “cheap” usually falls.
The practical upshot for buyers is that any monitor without near-real-time reporting undersells the whole point of the tariff — checking usage once a day tells you what happened, not what’s happening now, and Agile rewards the latter far more generously.
Agile Price Alerts: Getting Notified Before Prices Spike
Price alerts are the bridge between “I have a monitor” and “I actually change my behaviour,” and there are a few genuinely different routes to getting them.
The simplest is Octopus’s own app, which can push a notification once tomorrow’s rates are published, though it won’t proactively warn you the moment a specific half-hour crosses a threshold you personally care about. For that level of control, third-party tools built on Octopus’s open API — community projects and apps referenced on sites like energy-stats.uk — let you set a custom price ceiling and get an alert the moment a cheap or expensive window is imminent.
If your monitor supports Home Assistant, the most robust option is a local automation: a simple rule watching the Agile Octopus integration’s sensor and firing a phone notification (or, better still, directly switching a Shelly Plug S or similar) whenever the upcoming half-hour drops below your chosen pence-per-kWh figure. What most buyers overlook is that alerts alone rarely change behaviour for long — pairing an alert with an actual automation removes the human decision-making step that tends to lapse after the first excited fortnight.
Common Mistakes When Buying an Agile Energy Monitor
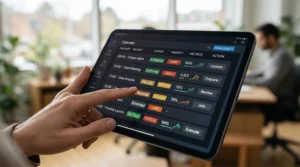
The most frequent mistake is buying a monitor before checking meter compatibility — SMETS1 households in particular waste money on devices built for SMETS2 hardware. A close second is assuming “smart plug with energy monitoring” automatically means “connects to Octopus Agile,” when in most cases it simply displays wattage and needs manual scheduling or a Home Assistant bridge to become genuinely price-aware.
Buyers also commonly underestimate installation effort for clamp-based monitors, expecting a five-minute plug-and-play experience similar to a smart plug, when a proper consumer-unit install may need an electrician depending on confidence and local wiring regulations. Finally, it’s worth avoiding the trap of buying the most expensive, most feature-packed monitor available “just in case” — a £15 smart plug on the one appliance that actually matters frequently outperforms a £140 whole-home system left in its default settings.
What to Expect: Real-World Performance
Specs on a box rarely match the lived experience, so here’s the honest translation. Real-time monitors reporting every few seconds feel genuinely useful for spotting spikes as they happen — you’ll notice, for instance, exactly how much an electric shower or kettle adds to your live wattage the moment it switches on. Devices reporting once a minute or slower are still perfectly usable for automations built around half-hourly Agile pricing, since the tariff itself only changes every thirty minutes anyway, so ultra-fast polling matters more for curiosity than for actual cost accuracy.
| Feature | What It Sounds Like | What It Actually Means Day-to-Day |
|---|---|---|
| “Real-time monitoring” | Instant, perfectly live data | Update intervals of 1-10 seconds are typical; genuinely fine for Agile’s 30-minute pricing granularity |
| “Whole-home monitoring” | Total household usage | Excellent for total cost tracking; won’t tell you which appliance is responsible without extra clamps |
| “Smart scheduling” | Reacts automatically to prices | Often means a fixed daily timer unless paired with an API-aware hub like Home Assistant |
| “App-based alerts” | Instant spike warnings | Usually next-day rate notifications, not live threshold alerts, unless built specifically for that |
Reading that table against the marketing on most product listings, the gap tends to sit around “smart” and “real-time” — both terms get used loosely, and the Shelly and Hildebrand ranges are among the more transparent about what their APIs genuinely deliver versus what’s cloud-dependent marketing gloss.
Long-Term Cost & Maintenance
Most of the monitors here have no ongoing subscription for core functionality — the hardware cost is close to the total cost of ownership, which is a meaningful advantage over some smart home ecosystems that charge monthly for historical data or advanced automations. Where costs can creep in is optional cloud features: some apps gate longer-than-30-day history or advanced circuit detection behind a premium tier, so it’s worth checking current listings for exactly what’s included free before assuming parity across brands.
| Cost Factor | Smart Plugs (Tapo/Shelly) | Whole-Home Clamp Monitors |
|---|---|---|
| Upfront cost | Lower (under £30) | Higher (£45-£140 range) |
| Ongoing subscription | Typically none | Typically none for core data |
| Installation cost | £0 (plug and go) | Possible electrician fee for clamp fitting |
| Maintenance | Occasional firmware updates | Occasional firmware updates; clamps rarely need attention |
The clear pattern is that the larger upfront spend on a whole-home monitor is a one-off, not a recurring cost — over two or three years, the total cost of ownership gap between a £20 smart plug and a £120 whole-home monitor narrows considerably once you factor in how much more usage the whole-home option actually helps you shift.
Safety, Data Privacy & Smart Meter Regulations
Anything clamping onto or plugging into your home’s electrical supply is worth taking seriously from a safety standpoint. Plug-in monitors like the Tapo P110 and Shelly Plug S are designed for standard socket use and carry the usual UKCA/CE marking you’d expect from any UK electrical accessory, so installation risk is minimal. Clamp-based whole-home monitors are a different matter: fitting current clamps inside or near a consumer unit involves working close to live wiring, and if you’re not confident doing that safely yourself, it’s worth paying a qualified electrician for the initial install rather than risking it.
On the data side, it’s worth knowing that your smart meter itself communicates over a dedicated, secure national network run by the Data Communications Company, entirely separate from any third-party monitor you add — per Ofgem’s consumer guidance on smart meters, this network exists specifically to keep your usage data secure regardless of which supplier or add-on hardware you use. Devices like the Hildebrand Glow range access your data only with your explicit consent through their registration process, and local-API devices such as Shelly’s range can often operate without sending data to any cloud service at all, which some privacy-conscious buyers specifically prefer.
Frequently Asked Questions
❓ Does an energy monitor work with any Octopus Agile smart meter?
❓ Do I need Home Assistant to use an energy monitor with Octopus Agile?
❓ How much can I actually save by shifting usage to cheap Agile slots?
❓ Can an energy monitor send me Agile price alerts directly?
❓ Is a smart plug or a whole-home monitor better for Octopus Agile?
Conclusion
If there’s one thing worth taking away from all this, it’s that “best” genuinely depends on your meter, your appliances, and how deep you want to go — there’s no single energy monitor for Octopus Agile that suits everyone equally. For a first step, a Shelly Plug S or Tapo P110 on your single biggest appliance will teach you more about your own habits than any spec sheet ever could. For households ready to go further, the Hildebrand Glow Display, Shelly EM, Emporia Vue 2, and Aeotec Home Energy Monitor Gen5 each earn their higher price tags in different ways — real-time whole-home viewing, DIY-friendly local APIs, circuit-level detail, or native Z-Wave integration respectively.
What ties all seven together is that none of them save you money by simply existing on your wall — the saving comes from what you do once you can actually see the half-hourly rate against your real usage, whether that’s a manual habit change in week one or a full automation by week four. Octopus Agile rewards attention and flexibility more than almost any other UK tariff, and the right monitor is really just the tool that makes paying that attention easier.
✨ Ready to stop guessing when electricity is cheap? Check current prices on today’s picks and pair one with your Agile account this week — future-you, doing laundry at 2am for pennies, will thank you. 🔌⚡
Recommended for You
- Whole Home Energy Monitor Clamp: 7 Best UK Picks (2026)
- Hildebrand Glow vs Loop Energy Monitor: 7 Options Ranked 2026
- Best Smart Meter Add-On UK 2026: 7 Real-Time Monitors Ranked
Disclaimer: This article contains affiliate links. As an Amazon Associate, I earn from qualifying purchases. If you purchase products through these links, we may earn a small commission at no additional cost to you.
✨ Found this helpful? Share it with your friends! 💬🤗
